OK, I have to admit....my latest addiction is
CHALKBOARD PAINT!
Ever since I bought some to make my Pottery Barn Knock Off Chalkboard rocks for Halloween & my Chalkboard Frame,
it has become an OBSESSION! :)
But admitting I have a problem is the first step right?!?
So this post is all about all the projects I have recently done with chalkboard paint! *Just be prepared....this post may get a bit long! Sorry about that folks! There is just so many projects out there to cover & I wanted to be thorough!!! :)
I had seen so many cool ideas for creating blackboards!
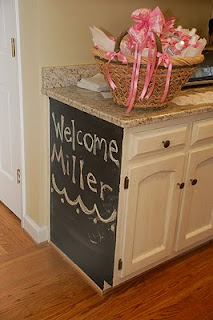
Here is some inspiration for ya!
 |
| Photo from Better Homes & Gardens (from House of Grace) |
 |
| Photo from The Country Chic Cottage |
 |
| Photo from Cinnaberry Suite |
 |
| Photo from House of Grace |
 |
| Photo from Meadow Lake Cottage |
 |
| Photo from Elefanta Sprout |
 |
| Photo from All Things Thrifty |
 |
| Photo from Maple Memories |
Also check out these blog posts all about Chalkboard Paint Inspiration:
OK, now that you are as inspired as I am, let me show you what I made out of all that inspiration!!!!
PROJECT #1: Pantry Door Makeover
Here is the before:
 |
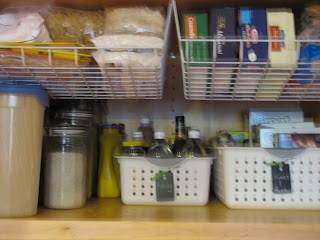
| BEFORE First, I put down some cardboard under the doors so I wouldn't get sawdust &/or paint on my kitchen floors. Then I lightly sanded down the area I was going to paint, wiped it down with a dry cloth to get all the sawdust & I taped off the door with painters tape. I then painted the inside area with my chalkboard paint. It took about 3 coats. I let it dry about a 1/2 hour between coats. Once semi dry with the last coat I removed the painters tape & WHOLA!!! Instant chalkboard for my grocery list & Menu for the week! AFTER Well once I got these done, I started several other chalkboard projects. Especially since I had all my supplies out & ready. (I was on a roll!!!) PROJECT #2: Chalkboard Canister Labels My next project was to do labels on my canisters. I had recently re purposed some jars for misc. items in my pantry. I basically just took some salsa jars, pickle jars, spaghetti sauce jars & spray painted the lids black. I started out by making a template. I used some old contact paper I had lying around and my Stampin' Up Tag Punch. I just folded over a piece of cut contact paper & put the folded edge into my punch. Only put it in as far as the cutting edge so that you don't cut through the folded portion like the photo below. Then PUNCH it. I made up a bunch of these templates & stuck them on my jars. Then just brush a couple coats of your chalkboard paint over the template. Mine took 2 coats. I let them dry about a 20 minutes in between coats. Then remove your template & WHOLA!!! Canister's with chalkboard labels! PROJECT #3: COUNTERTOP SAMPLE CHALKBOARD TAGS OK, you know those FREE little counter top samples you get from Menard's, Home Depot, Lowe's, etc that you can take home to check your colors when you are in the market for new counter tops? Well I had a ton of them left from our remodel several years ago. I came across them in my recent cleaning out the crap binge or DECRAPIFICATION (as one of my fellow blogger's calls it!). Well you know me, I tend to be a pack rat & never throw anything out. You know, I may need it someday ! :) Well I am glad I keep them, because they worked perfect for my chalkboard tags! BEFORE Basically all I did with this project is use my Chalkboard Spray paint to give them a good coat! Let them dry. And with a little ribbon, they are UBER CUTE tags for baskets! AFTER PROJECT #4: More Chalkboard Paint Labels I started out with these "Rubbermaid/Tupperware-type" containers. BEFORE I taped off my areas with painters tape. I then lightly sanded the areas I was going to paint (*this is very important...these type of containers, the paint tends not to stick to the surface otherwise!). Then paint the taped off areas with your chalkboard paint. These needed 2 coats as well. And WHOLA! AFTER Hope you enjoyed that very long, but inspirational post! I told you I was on a roll!!! :) I Linked up to: |


Thanks so much for featuring me in this wonderful list of great chalkboard paint uses! I absolutely love everything I've just seen!
ReplyDeleteYOU ARE TOO DANG SWEET! Thanks for posting my project. I am in love with everything you did. I really like the little hanging tags on the baskets. SO CUTE, and what a cool way to upcycle. Thanks again! I'm so happy I was able to inspire SOMEONE:)
ReplyDeleteJennie @ Cinnaberry Suite
wow, you got a lot of bank for your buck...I think I'mma have to try the chalkboard paint; especially since JoAnn's carries it in different colors I think.
ReplyDeleteWOW! You have been really busy girl! I am impressed. Thanks for featuring me. I love your tag idea. Great job.
ReplyDeleteBonnie :)
Look at how cute all of this stuff turned out! I have some of those tags and I was going to do this and completely forgot. I love the idea of the canisters that you made!!!!! They all turned out super cute!!!! Thanks for linking up to Tuesday Tell All and for reminding me.
ReplyDeleteWhat great ideas! Thanks so much for stopping by and joining us at Anything Related!
ReplyDelete{Rebekah}
Thanks so much for the linky love!! I love chalkboard paint!! :)
ReplyDeleteI love organizing and chalkboard paint. Chalkboard paint makes the mundane clever and personal. Well, once you use it as chalkboard :)
ReplyDelete