Friday, December 31, 2010

New Years Resolutions/To Do List

New Years Resolutions Pictures, Images and Photos

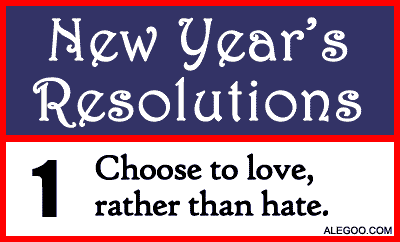
This year I am really going to get serious on my Resolution list. Every year I feel a need for change in someway shape or form. But this year is a bit different. I am starting a brand new job on Monday, January 3rd. Back to work after almost 7 1/2 years off (I have been blessed to be a stay at home mom with my two boys). So there will be ALOT of new changes in my household. I feel like I should take this opportunity to start a few changes in all the areas of my life. This list reads a little more like a TO DO LIST than a resolution list. Which honestly works better with my personality, I am a list maker...I live & breath by lists! :)

I have compartmentalized my list by different areas in my life.

Here goes...

Green Living Resolutions:
-Buy more locally grown foods (Farmers Market)
-Embrace minimalism
-Complete my switch to natural cleaners (I am almost there, just a few more to switch out)
-Reduce the amount of trash my family creates
-Reduce plastic use (mainly in food storage, etc)


Home Living Resolutions:
-Eat seasonally
-Cook more from scratch
-Can/Freeze more food
-Start Meal Planning
-Create a regular chores schedule
-Reorganize & update our home filing system
-Reduce our paper clutter
-De clutter our home & get rid of un needed items


Personal Lifestyle Resolutions:
-Reduce stress in my life
-Reduce my sugar intake
-Reduce my processed food intake
-Drink MORE water
-Exercise daily & tone up
-Get up earlier
-Schedule time for ME
-Get rid of negative talk
-Choose to praise rather than gossip
-Be more productive
-Get more consistent about my blog & blogging


Family/Relationship Resolutions:
-Plan a weekly game night either Wii or board games
-Spend more time in prayer


Financial Resolutions:
-Stick to our budget
-Pay off our debt
-Rebuild our savings/emergency fund

So there you have it. My Resolutions/To Do List for 2011.
I hope you all have a Happy & Healthy New Year!

New Years Resolutions Pictures, Images and Photos

Monday, December 27, 2010

Getting Organized in the New Year!

One of the things that ALWAYS hits my New Year's Resolution list is to be more organized! Now many people that know me, think I am already there, that I am already UBER organized. And although I have MANY organizational systems at work in my home. They tend to get out of whack when I am short on time. Instead of using the system I just toss things in & say I will deal with it later! Well around the holidays, short on time is a understatement, and many of my systems are out of whack or need a tune up. Also my house is full of so much stuff I don't need right now so I will be decrapifying it as well! 
So to start off my organization & decrapification I am joining "A Bowl full of Lemons" organization challenge. Starting January 1st, 2011 she will be blogging tips & challenges. One per day for the full month of January. I plan on taking her challenge and hopefully you will too! I will post about my progress as the month goes on & hopefully by the end of the month....we will ALL be more organized! Go check it out!


I also wanted to let all my readers know that I will be starting a new job after the New Year as well. I know, I FINALLY got a job! I hope to continue to keep up with my blogging but if I become a blogger slacker, you will know why! :)

Friday, December 24, 2010

Merry Christmas Everyone!

I hope you all have a HAPPY & HEALTHY CHRISTMAS!!!!
From our House to yours!!!


Merry Christmas!

Wednesday, December 22, 2010

Triple Chocolate Meringue Fudgie Cookies

I recently found this recipe and tried it last week while doing my holiday baking. I just had to share these cookies were way better than I expected and my kids ate them up. These cookies are really addicting & they are more brownie like than cookie, which in my opinion made them even better!  I found the recipe over at Disney Family.com Here is where I got the recipe.
Check it out here!

Triple Chocolate Meringue Fudgie Cookies

Total time: 35 minutes


Yield: 2 dozen


Ingredients


1 1/2 cups semisweet chocolate chips, divided use


3 large egg whites, room temperature


2 1/2 cups powdered sugar, divided use


1/2 cup unsweetened cocoa powder


1 tablespoon cornstarch


1/2 teaspoon kosher salt (or half as much table salt)


1 teaspoon vanilla


Directions


Heat the oven to 375, and spray 2 large baking sheets with cooking spray, or line them with parchment.


Melt 1 cup of the chocolate chips in the microwave, stirring occasionally, until they are mostly melted, about 2 minutes. Stir until fully melted, then leave them to cool.


Using an electric mixer with the whisk attachment, beat the whites on high speed until they just form soft peaks. Gradually beat in 1 cup of the sugar, and continue beating until the mixture gets thick and glossy.


Whisk together 1 cup of sugar, the cocoa, cornstarch, and salt in a medium bowl to blend. On low speed, beat the dry ingredients into the meringue with the vanilla.


Now, with a wooden spoon, stir in the lukewarm chocolate and remaining 1/2 cup chocolate chips. The dough will be batter-like at first and then, as you stir, it will get very stiff.


Place the remaining 1/2 cup of sugar in a bowl. Roll 1 rounded tablespoon of dough into a ball, then roll it in the sugar to coat it thickly. Place on prepared sheet, and repeat with the remaining dough, spacing the balls 2 inches apart.


Bake until the cookies are puffed and the tops crack, about 10 minutes. Cool on the sheets on a rack 10 minutes, then transfer the cookies to a rack to cool completely.
 
Enjoy!!!
 

Tuesday, December 21, 2010

Chocolate Covered Marshmallow Treats

I make several different types of cookies & treats for Christmas gatherings & for gifts to family & friends. CHOCOLATE is always on the recipe of most of my treats...me & my boys are HUGE chocolate lovers!
This is the simplest treat I make.

I buy the Holiday Shaped marshmallows (variations: Large marshmallows, chocolate swirl marshmallows, coconut marshmallows, etc) & chocolate almond bark or chocolate chips work too.


I have learned that the easiest way to melt chocolate for dipping anything is to put it in my little crock pot. After about 45 minutes it is perfectly melted and stays hot
& not icky for as long as I need it.


*Another quick tip is use the Crock pot liners and that will make clean up a snap!

So basically just dip the Holiday shaped marshmallows in the chocolate. Put them on cookie sheets lined with wax paper & wait for them to cool and the chocolate to harden!


I love that the holiday shaped ones are also colored!  This is what they look like inside!

Can't get any easier than that!


Enjoy!


Monday, December 20, 2010

Cute & Easy Thrifty Gifts: Wearable Flower Pins

I was shopping at Bath & Body Works works the other day and came across these super cute gift toppers for $2 each!
The instant I saw them I knew I had to have them, and I had bigger plans than just topping a gift.
I wanted to make some decorative pins to give as gifts!

I already had the supplies I needed to pull this off. (Adhesive Bar pins, thread, and a needle).

I started by cutting off the little ribbons that were attached. Then I added the adhesive backed bar pins. I then sewed the bar pins to give them a bit more stability for wear & tear.

(These last 2 photos were taken by my 7 year old
so they are a bit off centered )
So there you have it....super CUTE, fast & easy Wearable Flower Pins. These would make great last minute gifts for your friends, sisters, moms, aunts, grandmas, even teachers! Great project for those on a budget too!
Enjoy!!!

I am linking up to these FABULOUS Parties:


UndertheTableandDreaming
 

Photobucket


I HAVE BEEN FEATURED!!!!

I was fortunate enough to have my "Kids Snowman Handprint Ornaments" featured the other day by "Wiccan Make Some Too" blog. Go check it out here. Thanks so much for featuring me!


Wednesday, December 15, 2010

Kids Snowman Handprint Ornaments

I saw this idea over at "Full of Great Ideas" blog. I thought it was just darling. Check it out here.
I usually try and give the grandparents something homemade from the boys every year. When I saw this, I said to myself, this was my idea for this year.
This was WAY EASIER than I anticipated. I actually put off making these thinking they were going to be a real pain & MESSY. But I was happily surprised when the kid's portion of the project literally took 5 minutes each. We made 16 total ornaments (8 for each kid). It was super easy & cleanup was really a snap.

This is what I started with: A Dollar Tree find $1 for each package.


Here is the end result:


I also added this little poem to each ornament.
*I got this from her blog as well.

"These aren't just five snowmen
As anyone can see.
I made them with my hand
Which is a part of me.
Now each year when you trim the tree
You'll look back and recall
Christmas of 2010
When my hand was just this small!"


Feel free to use the tag I created in Picnik, just please give credit back to my blog.

Go to Full of Great Ideas blog for the full tutorial here.

Enjoy!!!!


I am linking to these FABULOUS Parties:

Ornament Party


Tuesday, December 14, 2010

Grandma's Homemade Ham Bone Soup with Dumplings


This post should have been written after Thanksgiving, but that is how far behind I am. My mom's family usually has both Ham & Turkey for Thanksgiving. Some prefer one over the other, so we do both to accommodate everyone.


My favorite is ham. It so reminds me of my Grandma Sally and how she would make Ham bone soup & dumplings with the left over ham bone & ham. I grew up on this recipe.
But you know how it never seems to be as good as when someone else makes it! Well that was me & this soup. 
After not attempting to make it for the past couple years as it never tasted as good as hers I think I FINALLY did got it right.
This was a home run with my two boys! They LOVED it & I think I will be making it for years to come.
So here is the recipe!

Ham Bone Soup & Dumplings
Ham Bone
Ham (leftover ham cut up)
3-4 Carrots (peeled and cut up into chunks)
1 Can Tomato Soup
1/2 Onion chopped
6 Potatoes (peeled and cut up into chunks)
2 Celery Stalks (cut up)
2 Tablespoons Vinegar
Bag of frozen Mixed Veggies or other fresh veggies (optional)

-Put ham bone & remaining ham meat into a large kettle. Cook with water covering the bone. Add the vinegar to the water. Simmer for several hours with cover on kettle.
-After several hours remove from heat & let cool. Skim off the fat once cooled (the fat will thicken & can be removed easily). Remove bone & any remaining meat on bone should be easy to remove. Add all to soup.
-To make soup, add tomato soup, celery, potatoes, carrots, onions & any other veggies you want.  Simmer again for an hour with cover on to cook the veggies through. Now you are ready to add the dumplings.

Dumplings:
1 1/2 Cups Flour (or more as needed)
1 tsp. Baking Powder
1 tsp. Salt
1 Egg (beaten lightly)
3/4 Cup Water (or more as needed)

-Mix flour, baking powder and salt. Add beaten egg & water to dry ingredients. Then drop by teaspoon into hot soup. Add all your dumplings then cover. Cook 10 minutes with cover on, then 10 minutes with cover off.


Enjoy!


Monday, December 13, 2010

Up cycled Thrift Store Ornaments

Last week my youngest & I went to LaCrosse to try and "almost" finish up the Christmas shopping. We got all but 4 people done. We went into one of my FAVORITE consignment shops called "What a Girl Wants". For you women readers out there, this is a wonderful shop! They have everything a girl would want there: purses, jewelry, clothes, shoes, home decor & so much more! I take things there to sell quite often. Especially during the fall & winter months. (BTW...they are also on Facebook, where they post specials & discounts ....find them here!)
*******UPDATE: This Shop is No Longer Open...Bummer!*******

While there I came across some vintage ornaments. Now the peach & mint green colors really aren't my favorite color choices, but I LOVED the shapes.


So for 49 cents I got 2 deer, 2 doves, a goose & teddy bears (about 8 cents each!!!).

I started off by taking off the flowers & ribbons that were just hot glued on. And removing the gold thread hangers. They all came off very easily. (I did save the hangers to put back on after they were painted....I also saved the peach & mint colored ribbons & flowers for a possible future project,you know me: I don't throw ANYTHING away!!!!)

I just primed them with spray paint primer, and then spray painted them the colors I really wanted:
Green, silver & white.


Once the spray paint dried I sprayed them once again, this time with spray adhesive. Then I generously sprinkled them with glitter. I tapped off the excess glitter &


WHOLA!!!


The green ornaments are a bit more green then the picture shows & they are all super sparkly!


Cute up cycled ornaments.
I am keeping a few for my own tree.
And giving some for cute present toppers on my gifts.
What do you think???


I am linking up to these FABULOUS parties:


Sumo Sweet Stuff 


Ornament Party